1. Create a course
Goal: create a course and fill in everything that describes it, then prove all of it survives a reload.
Prerequisite: signed in as admin or instructor.
Creating the course
-
Go to the course library — the Course Library entry in the left sidebar. It lists every course in your organization.
-
Click Create in the top right.
-
In the drawer, keep the content type on Course and change Version from
V1toV2— the field defaults to V1, which is the legacy engine. Everything in this guide is about V2.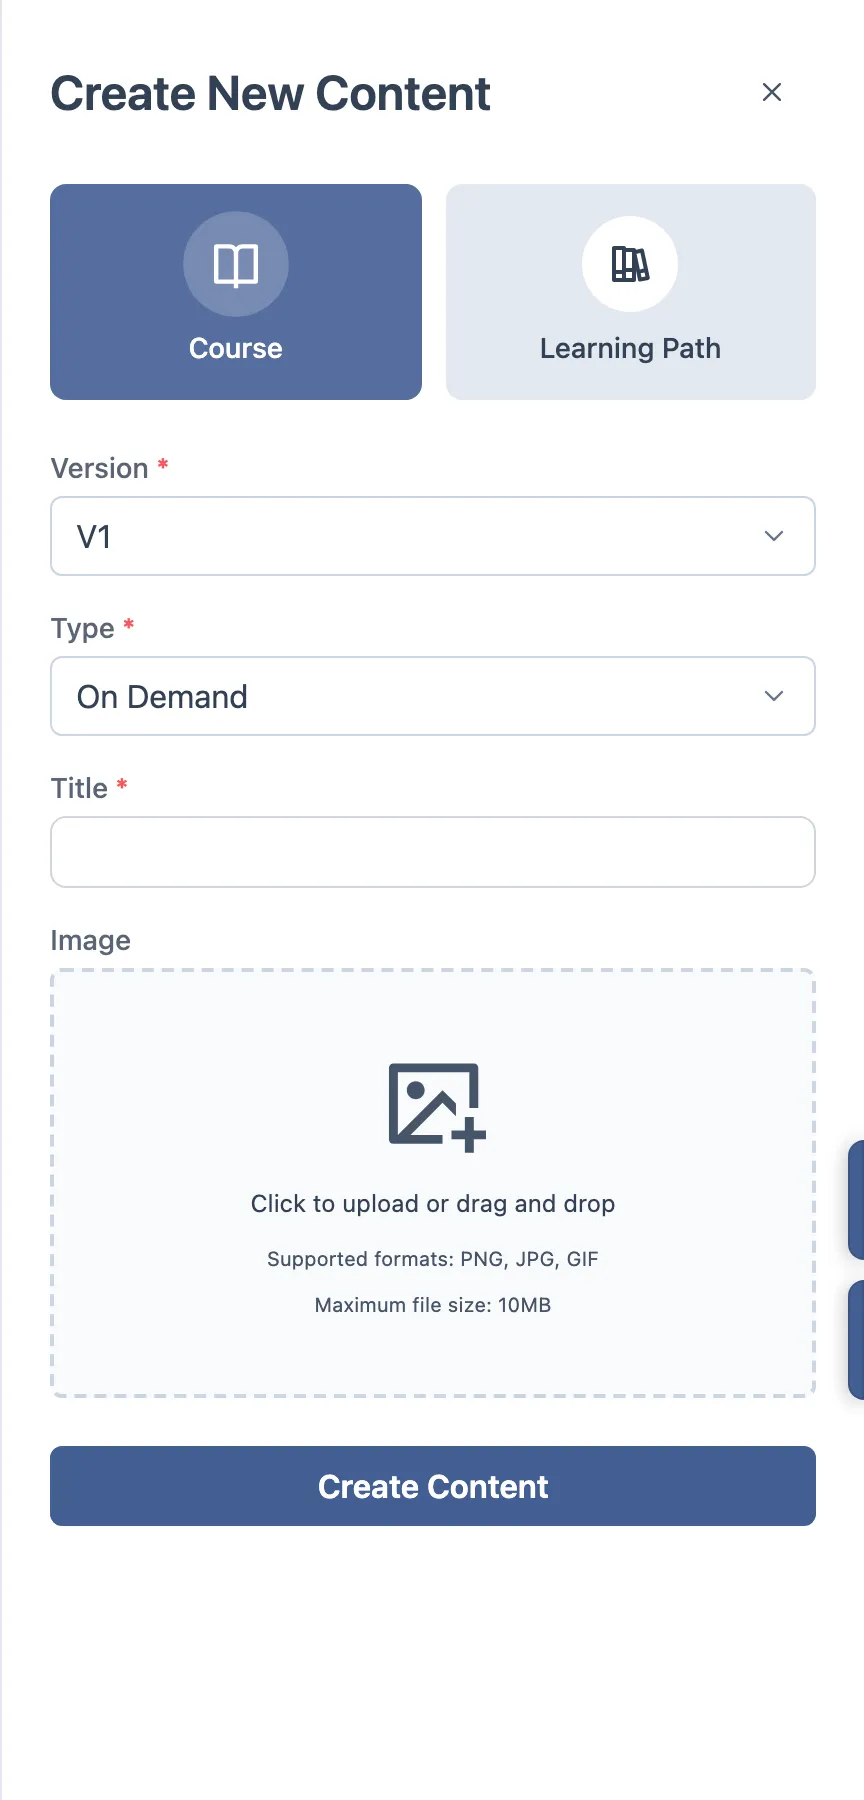
-
Leave Type on its default, type a Title with an accent and a special character —
Curso de Teste — ação & prática— and click Create Content.
You land in the course workspace. This is where you will spend flows 1 to 4.
The workspace, in one look
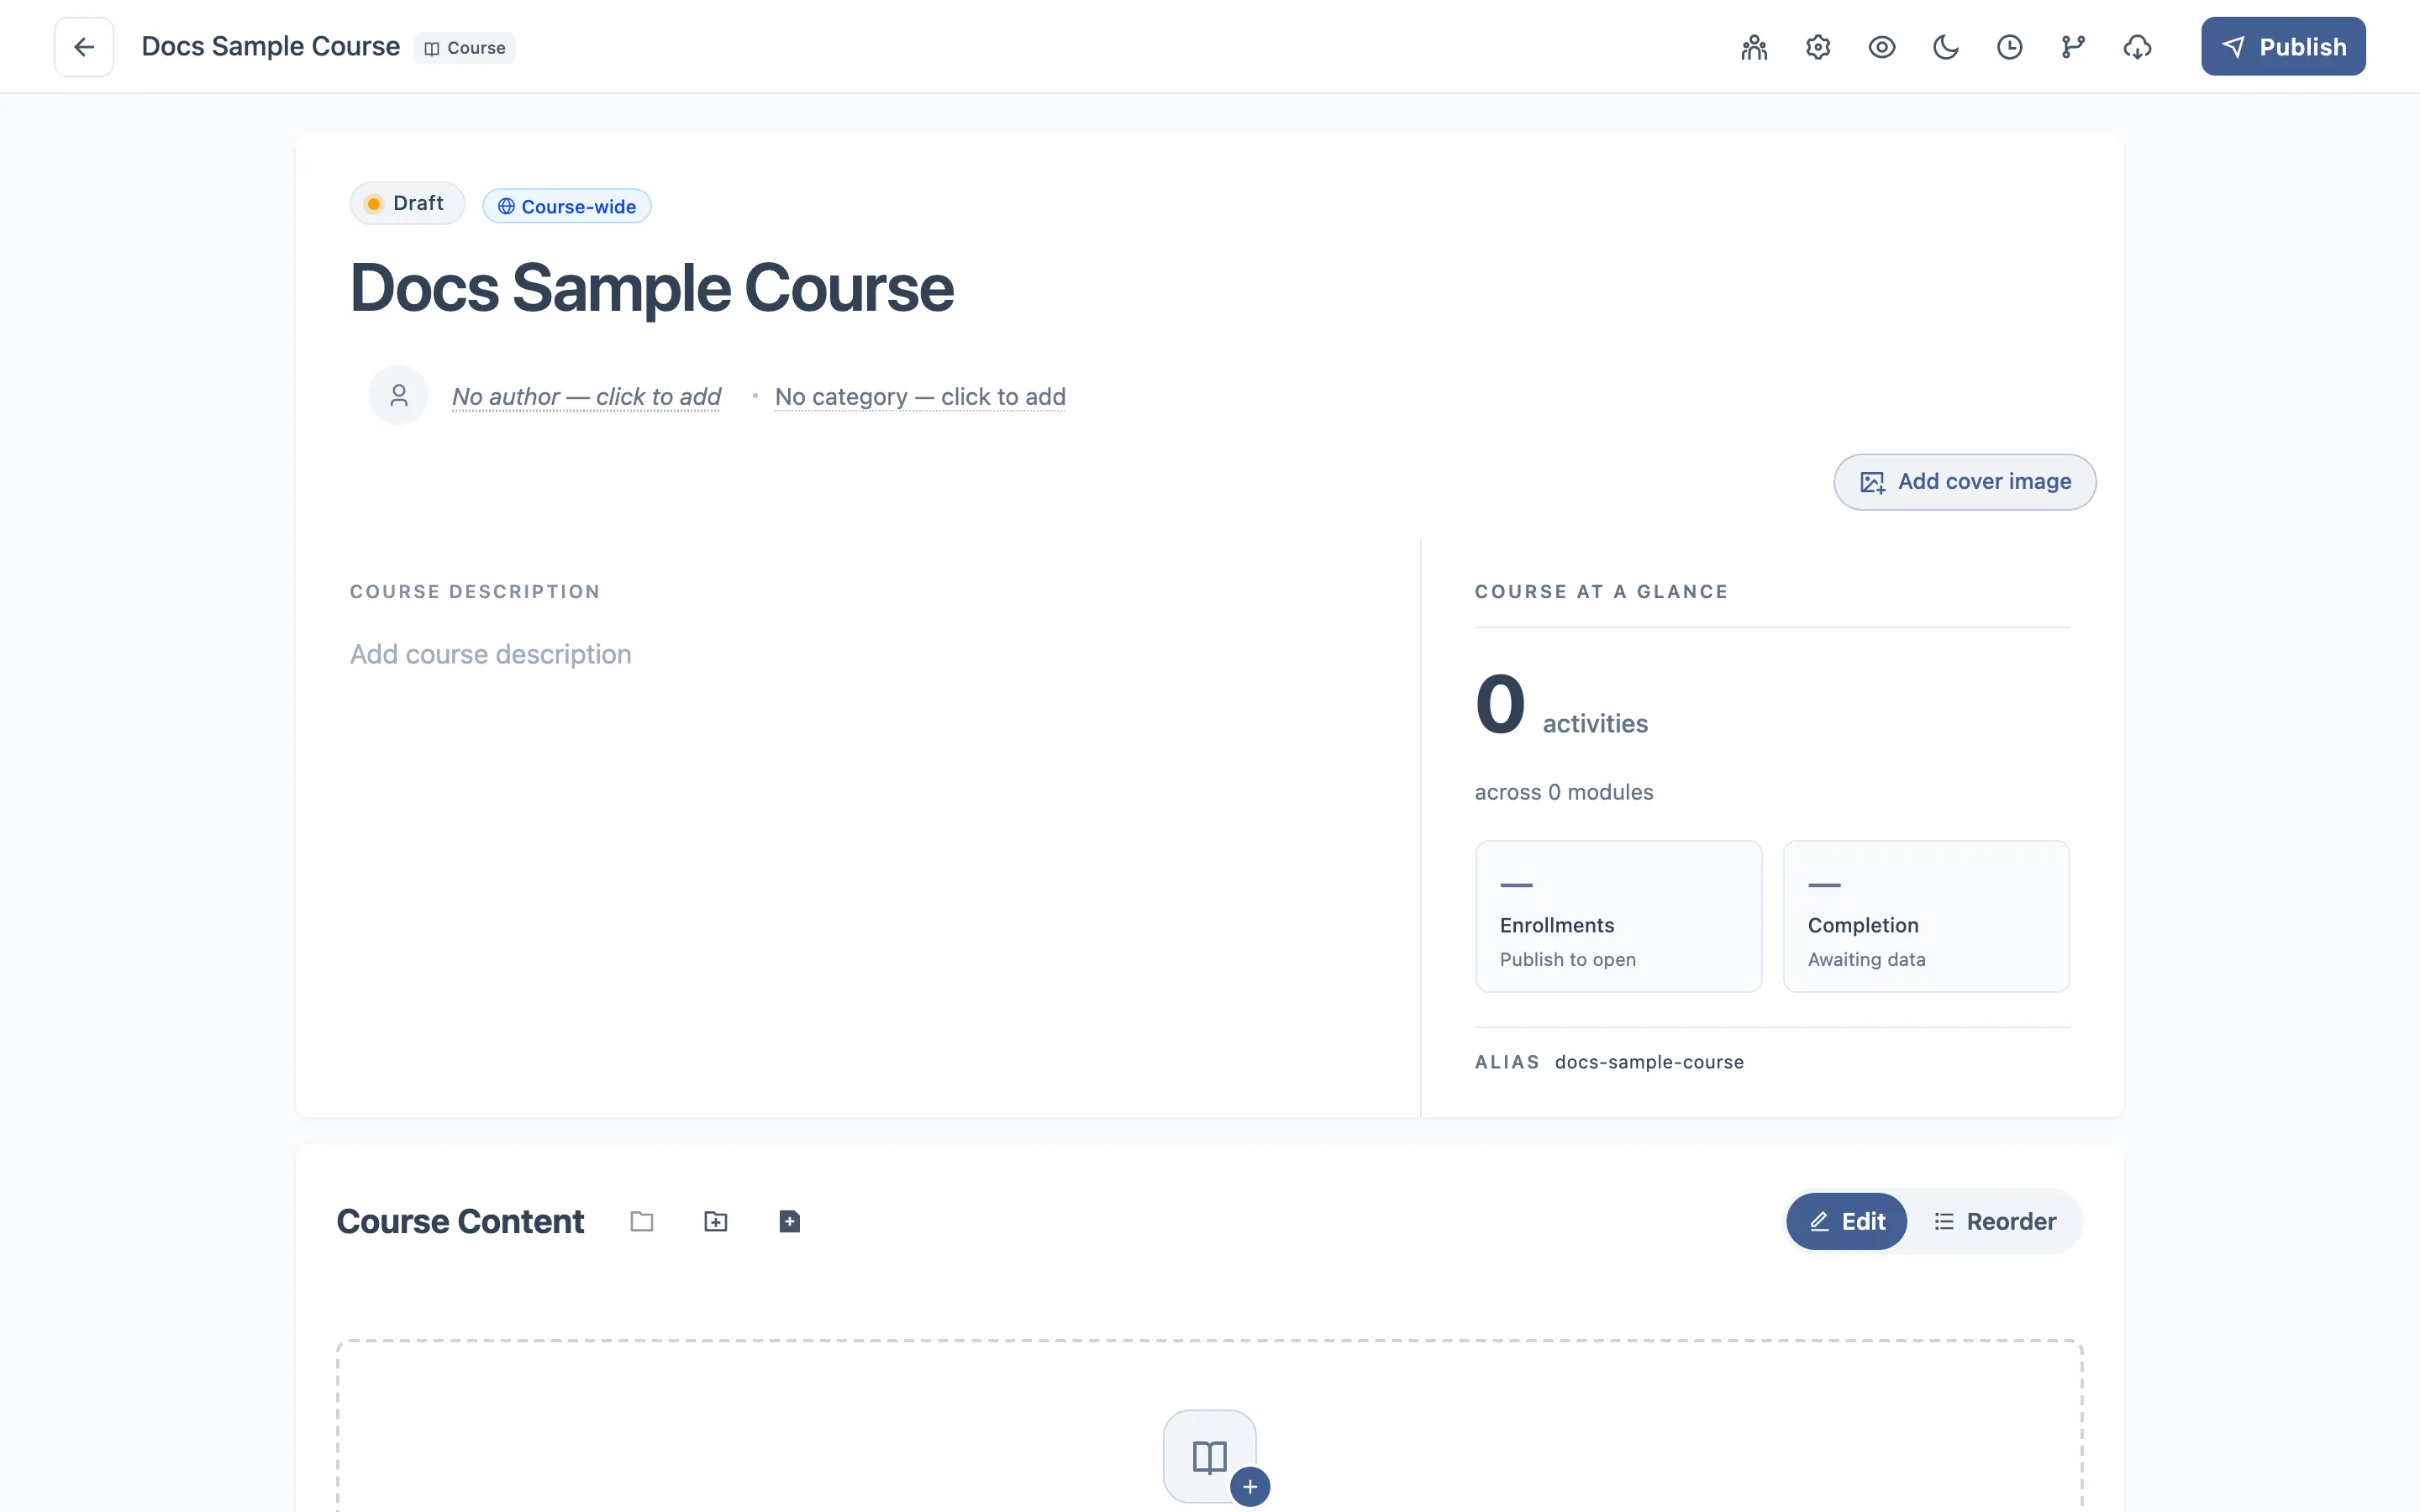
Three stacked sections:
| Section | What it is |
|---|---|
| Course Details | The hero at the top: cover image, status badges, title, authors, category, description and the Course at a glance panel |
| Course Content | The outline — modules and activities. That is flow 2 |
| Additional Resources | Extra links and files attached to the course |
The top bar
Nine controls, left to right. Several open a drawer over the page rather than navigating away:
| Control | What it does |
|---|---|
| ← Back | Returns to the course library |
| People | Enrollments — who is on this course (flow 5) |
| Gear | Course settings |
| Eye | Preview — a menu with two options: the catalog Details page, or the course as a learner sees it |
| Moon | Switches the interface between light and dark |
| Clock | Change history, with the option to restore an earlier version |
| Branch | Releases — the published versions (flow 4) |
| Download cloud | SCORM export. Stays disabled until the course qualifies |
| Publish | Publishes a release (flow 4) |
The badges
Above the title: a status chip (a new course reads Draft), the version label once
the course has been published at least once, and a Course-wide badge.
Filling in the details
Every field in the hero saves on its own — there is no Save button in this section. That is exactly why each one deserves a reload check.
Title
Click the title to edit it in place. It is limited to 120 characters and a counter
appears while you type. Click away or press Tab to save.
Authors
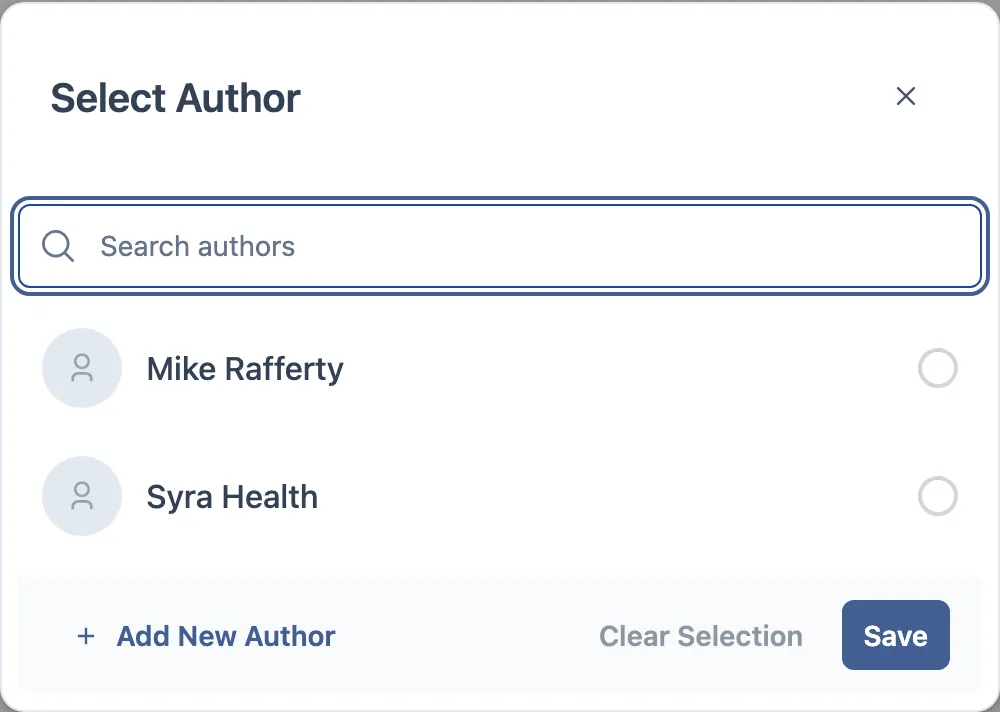
Under the title, on the left. A course with none reads No author selected.
Click it to open a dialog with a search box and the list of people. Click a person to
select, click a selected person again to remove them. More than one author is allowed
— the hero shows the first two avatars and then +N.
Category
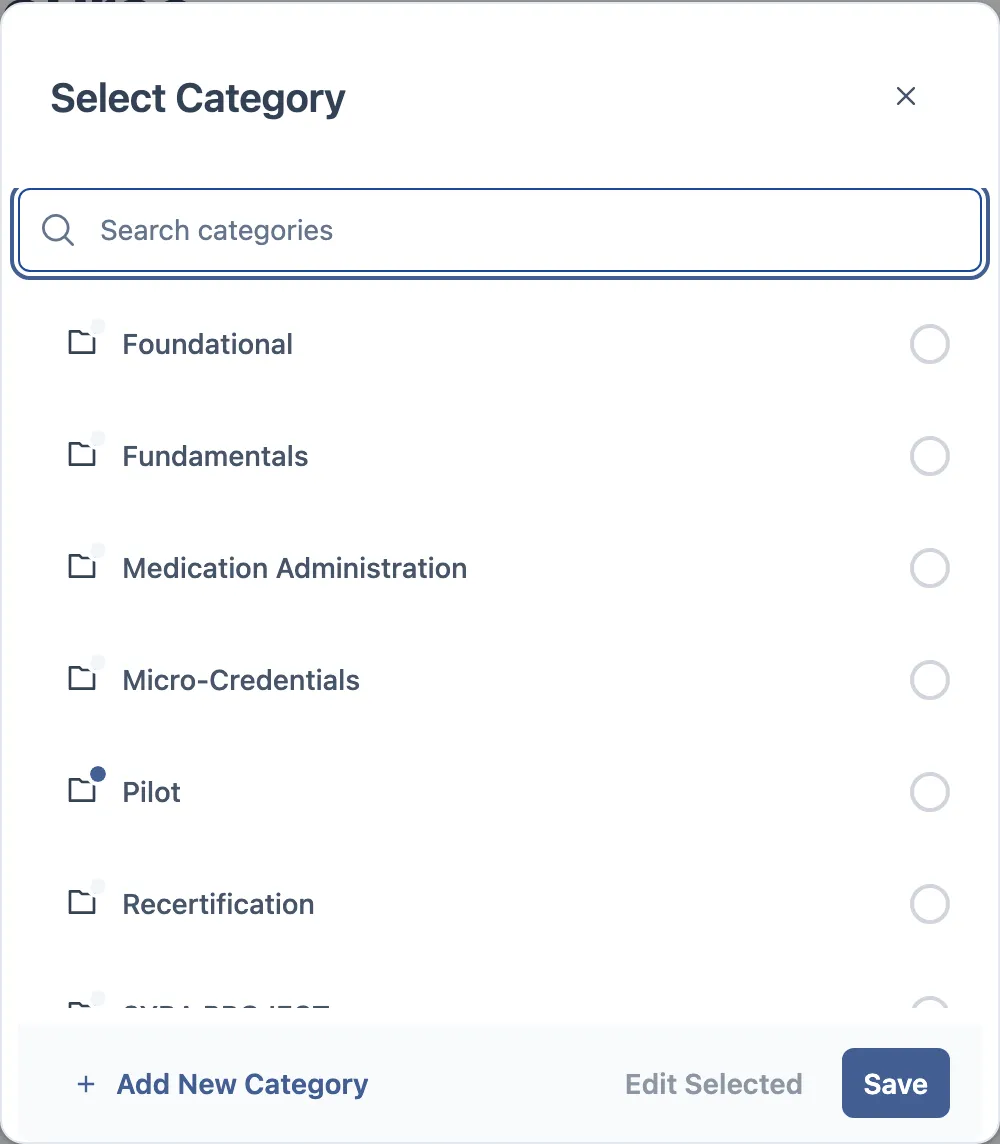
Next to the authors, separated by a dot. Empty it reads No category — click to add.
Click it and a dialog opens with a search box and the category list. Only one category at a time: picking a new one replaces the old, and clicking the selected one again clears it. Admins also get an Add new button in that dialog to create a category on the spot.
Cover image
An empty course shows an Add cover image button on the hero.
The picker offers two groups of sources:
- Browse — Unsplash, Pixabay, Giphy, Tenor, plus your organization’s own image library if that feature is on
- Create — Upload from your machine, plus AI generation if that feature is on
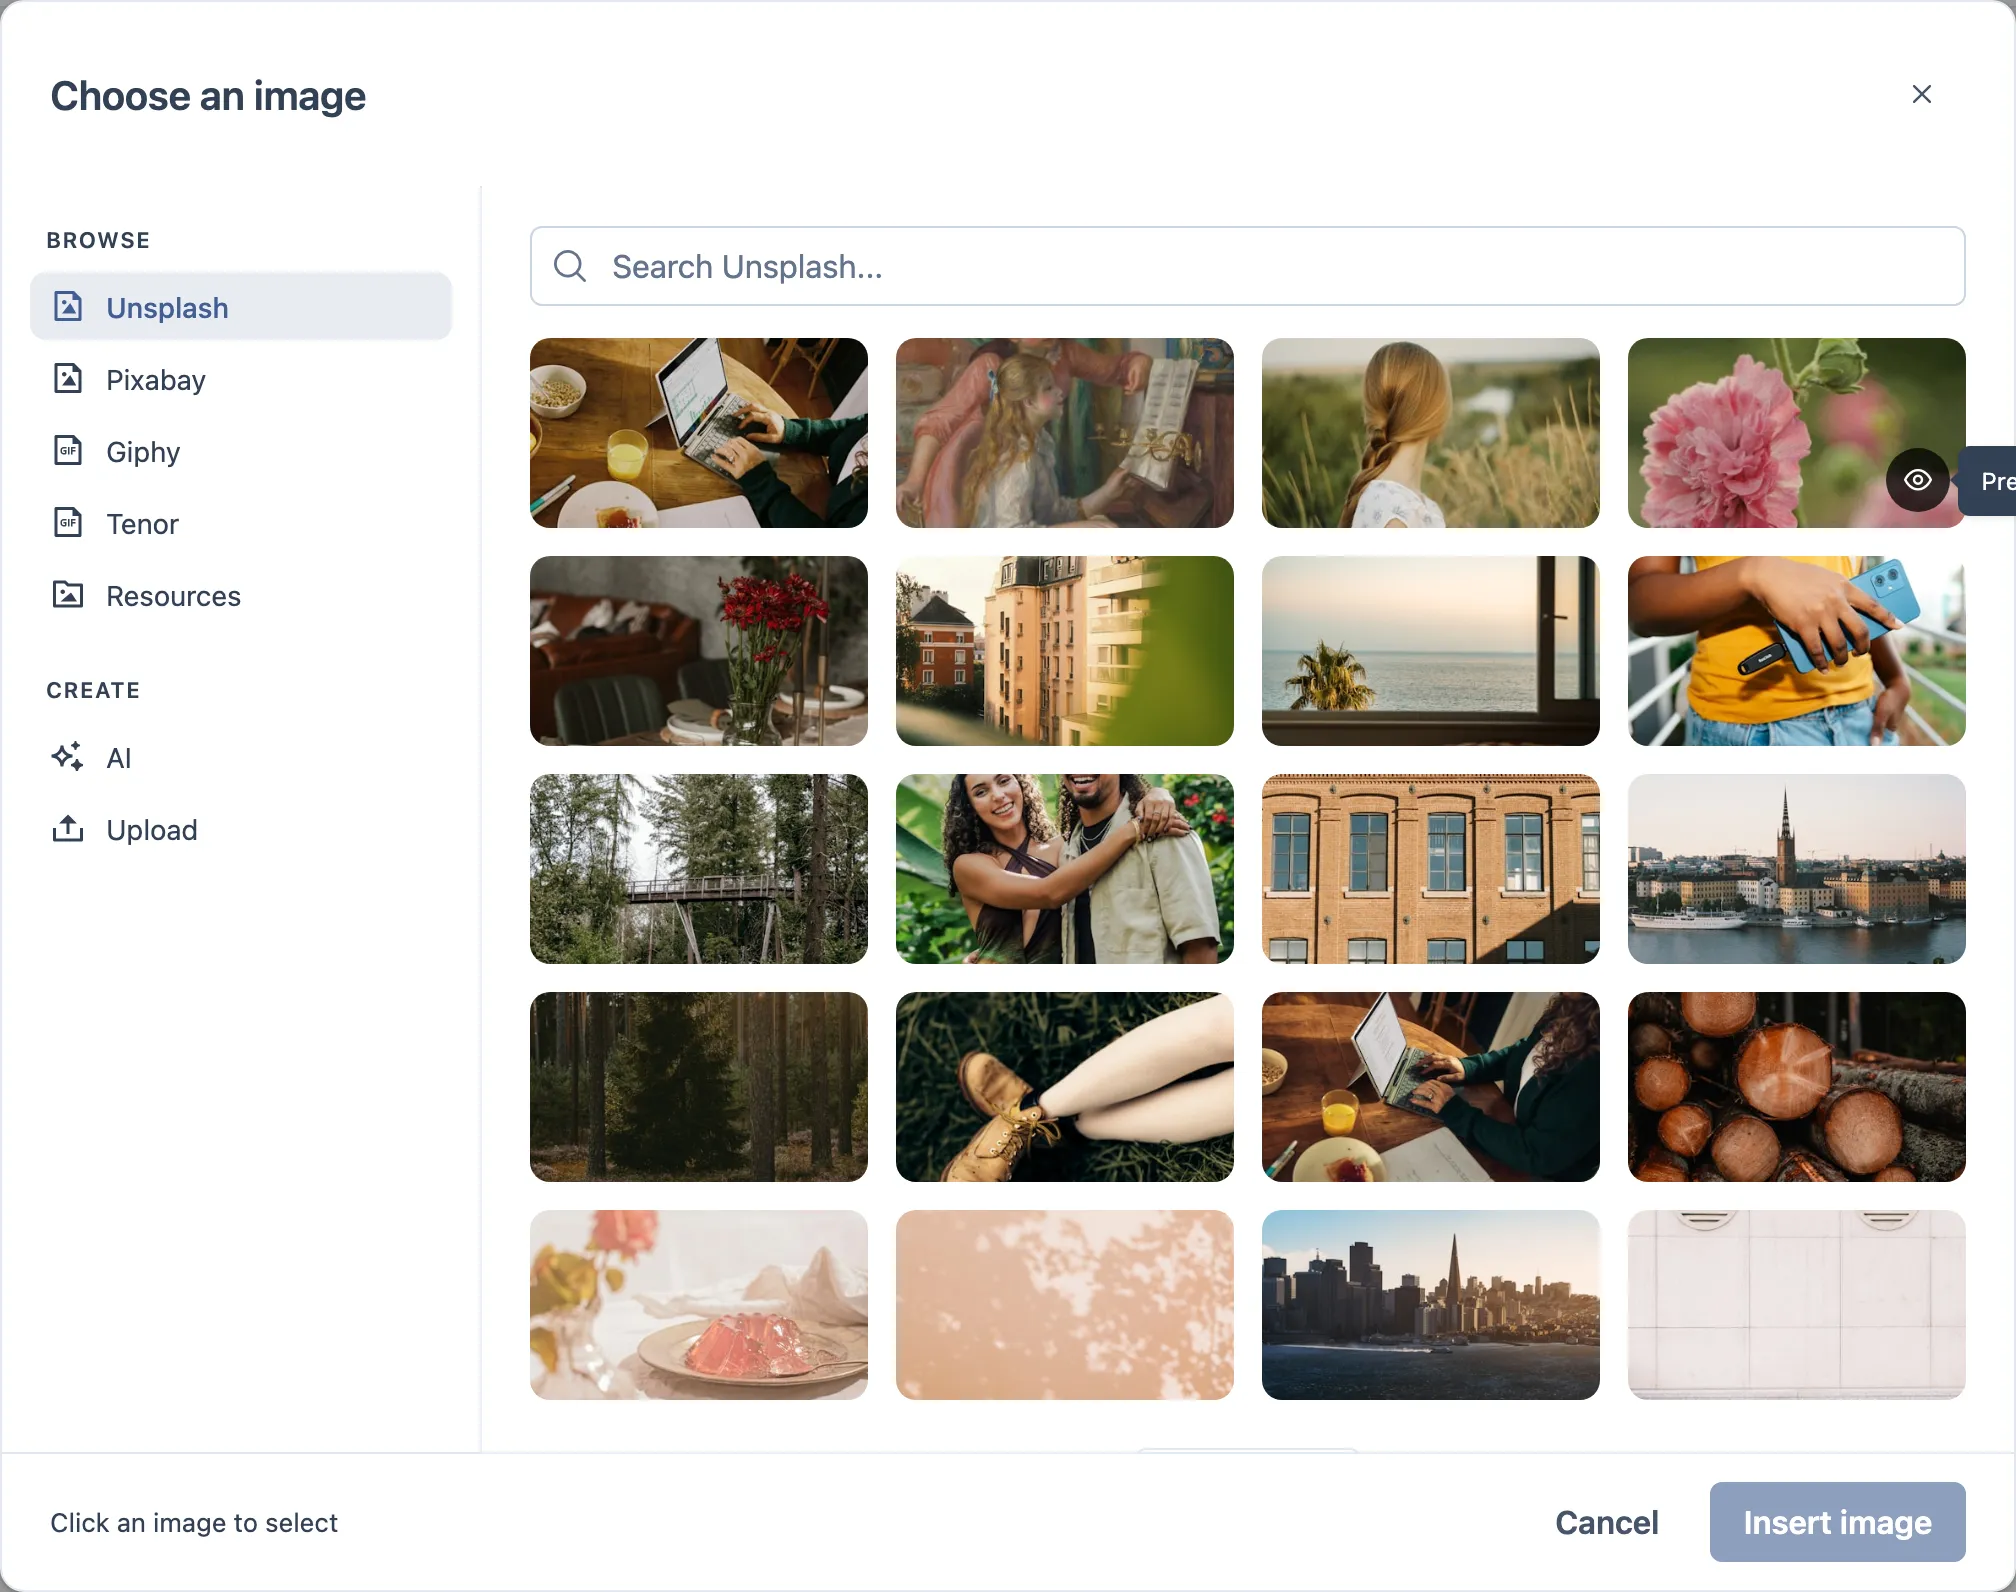
Uploads accept PNG, JPG and GIF, up to 10MB.
Once an image is in place, hovering it reveals its actions: replace, remove, reposition, re-crop, copy the image URL, image settings, and — under the image — an alt text bar. That bar is colour-coded: empty, warning, or ok. Alt text is what a screen reader reads in place of the image, so treat an empty bar as unfinished work.
Description
Below the cover, a rich text editor labelled Course Description. It saves as you write. Long descriptions are truncated at a fixed height with Show more / Show less.
Course at a glance
The panel on the right is read-only and derived from the rest of the course: the activity count, how many modules they sit across, an estimated duration, enrollments, completion, and the course alias (the URL-friendly name generated from the title). On a new course enrollments reads Publish to open and completion reads Awaiting data — that is correct, not a fault.
Steps
- Rename the title to something with accents. Reload.
- Add two authors, then remove one.
- Pick a category, then pick a different one, then clear it.
- Add a cover image from Unsplash, then replace it with an uploaded file.
- Write alt text for the image and check the bar turns green.
- Write a description with a couple of paragraphs and some bold text.
- Hard reload the page (
Cmd/Ctrl + Shift + R) and go through all of it again.
What to check
- The title comes back exactly as typed, accents included, and the counter stops you at 120 characters.
- The alias is spaceless and accent-free, and does not collide with another course.
- Both authors show; removing one leaves the other alone.
- Selecting a second category replaces the first rather than adding to it.
- The image is still there after the reload, not just right after upload.
- The alt text saved along with the image.
- Description formatting survives the reload.
- The Course at a glance panel matches reality.
If someone else is editing
A V2 course can only be edited by one person at a time. If a colleague already has it open, a dialog offers you the choice to take over the edit or leave. If someone takes it over while you are inside, you get told and lose the edit lock.
This is expected behavior. Worth triggering on purpose — two browsers on the same course — because it is easy to mistake for a bug.
Where it usually breaks
- Leaving Version on the V1 default and ending up with a legacy course.
- Accents and
&in the title or the alias. - The image disappearing after a reload — the upload worked, the reference did not stick.
- Alt text that does not save with the image.
- Saving twice quickly and the second save overwriting the first.
- Two tabs open on the same course.